Building in Web3: Terminal Time – Wallets, Localnets, and Solana CLI
Forget risky decentralized exchanges and browser extensions. In part three of our Web3 series, we open up the terminal. We use the Solana CLI to securely generate an offline wallet, clarify the confusing difference between Solana clusters, spin up a local blockchain to bypass dry testnet faucets, and programmatically construct and broadcast a transaction.
Terminal Time: Wallets, Localnets, and Solana CLI
In our previous posts, we established that a blockchain is just a shared database, a wallet is just a mathematically linked keypair, and much of the Web3 space is plagued by a severe lack of basic security principles.
Now, we are going to interact with the blockchain exactly how it was designed to be used: programmatically, via the Command Line Interface (CLI).
We will be using Solana for this tutorial. Because its architecture handles incredibly high throughput, it is the current network of choice for both legitimate high-speed applications and the memecoin frenzy we discussed in Part 2.
Let's get our local environment set up and start tinkering.
1. Prerequisites: Installing the Solana Tool Suite
To talk to the Solana network directly, we need its CLI tools. Open your terminal and run the installation script. (Note: Always verify installation commands directly from the official Solana/Anza documentation).
macOS & Linux:
sh -c "$(curl -sSfL [https://release.anza.xyz/stable/install](https://release.anza.xyz/stable/install))"
Windows Users: It is highly recommended to install Windows Subsystem for Linux (WSL) and run this command inside your Ubuntu terminal.
Once installed, verify it’s working:
solana --version

2. Setting the Environment (The Great Testnet vs. Devnet Confusion)
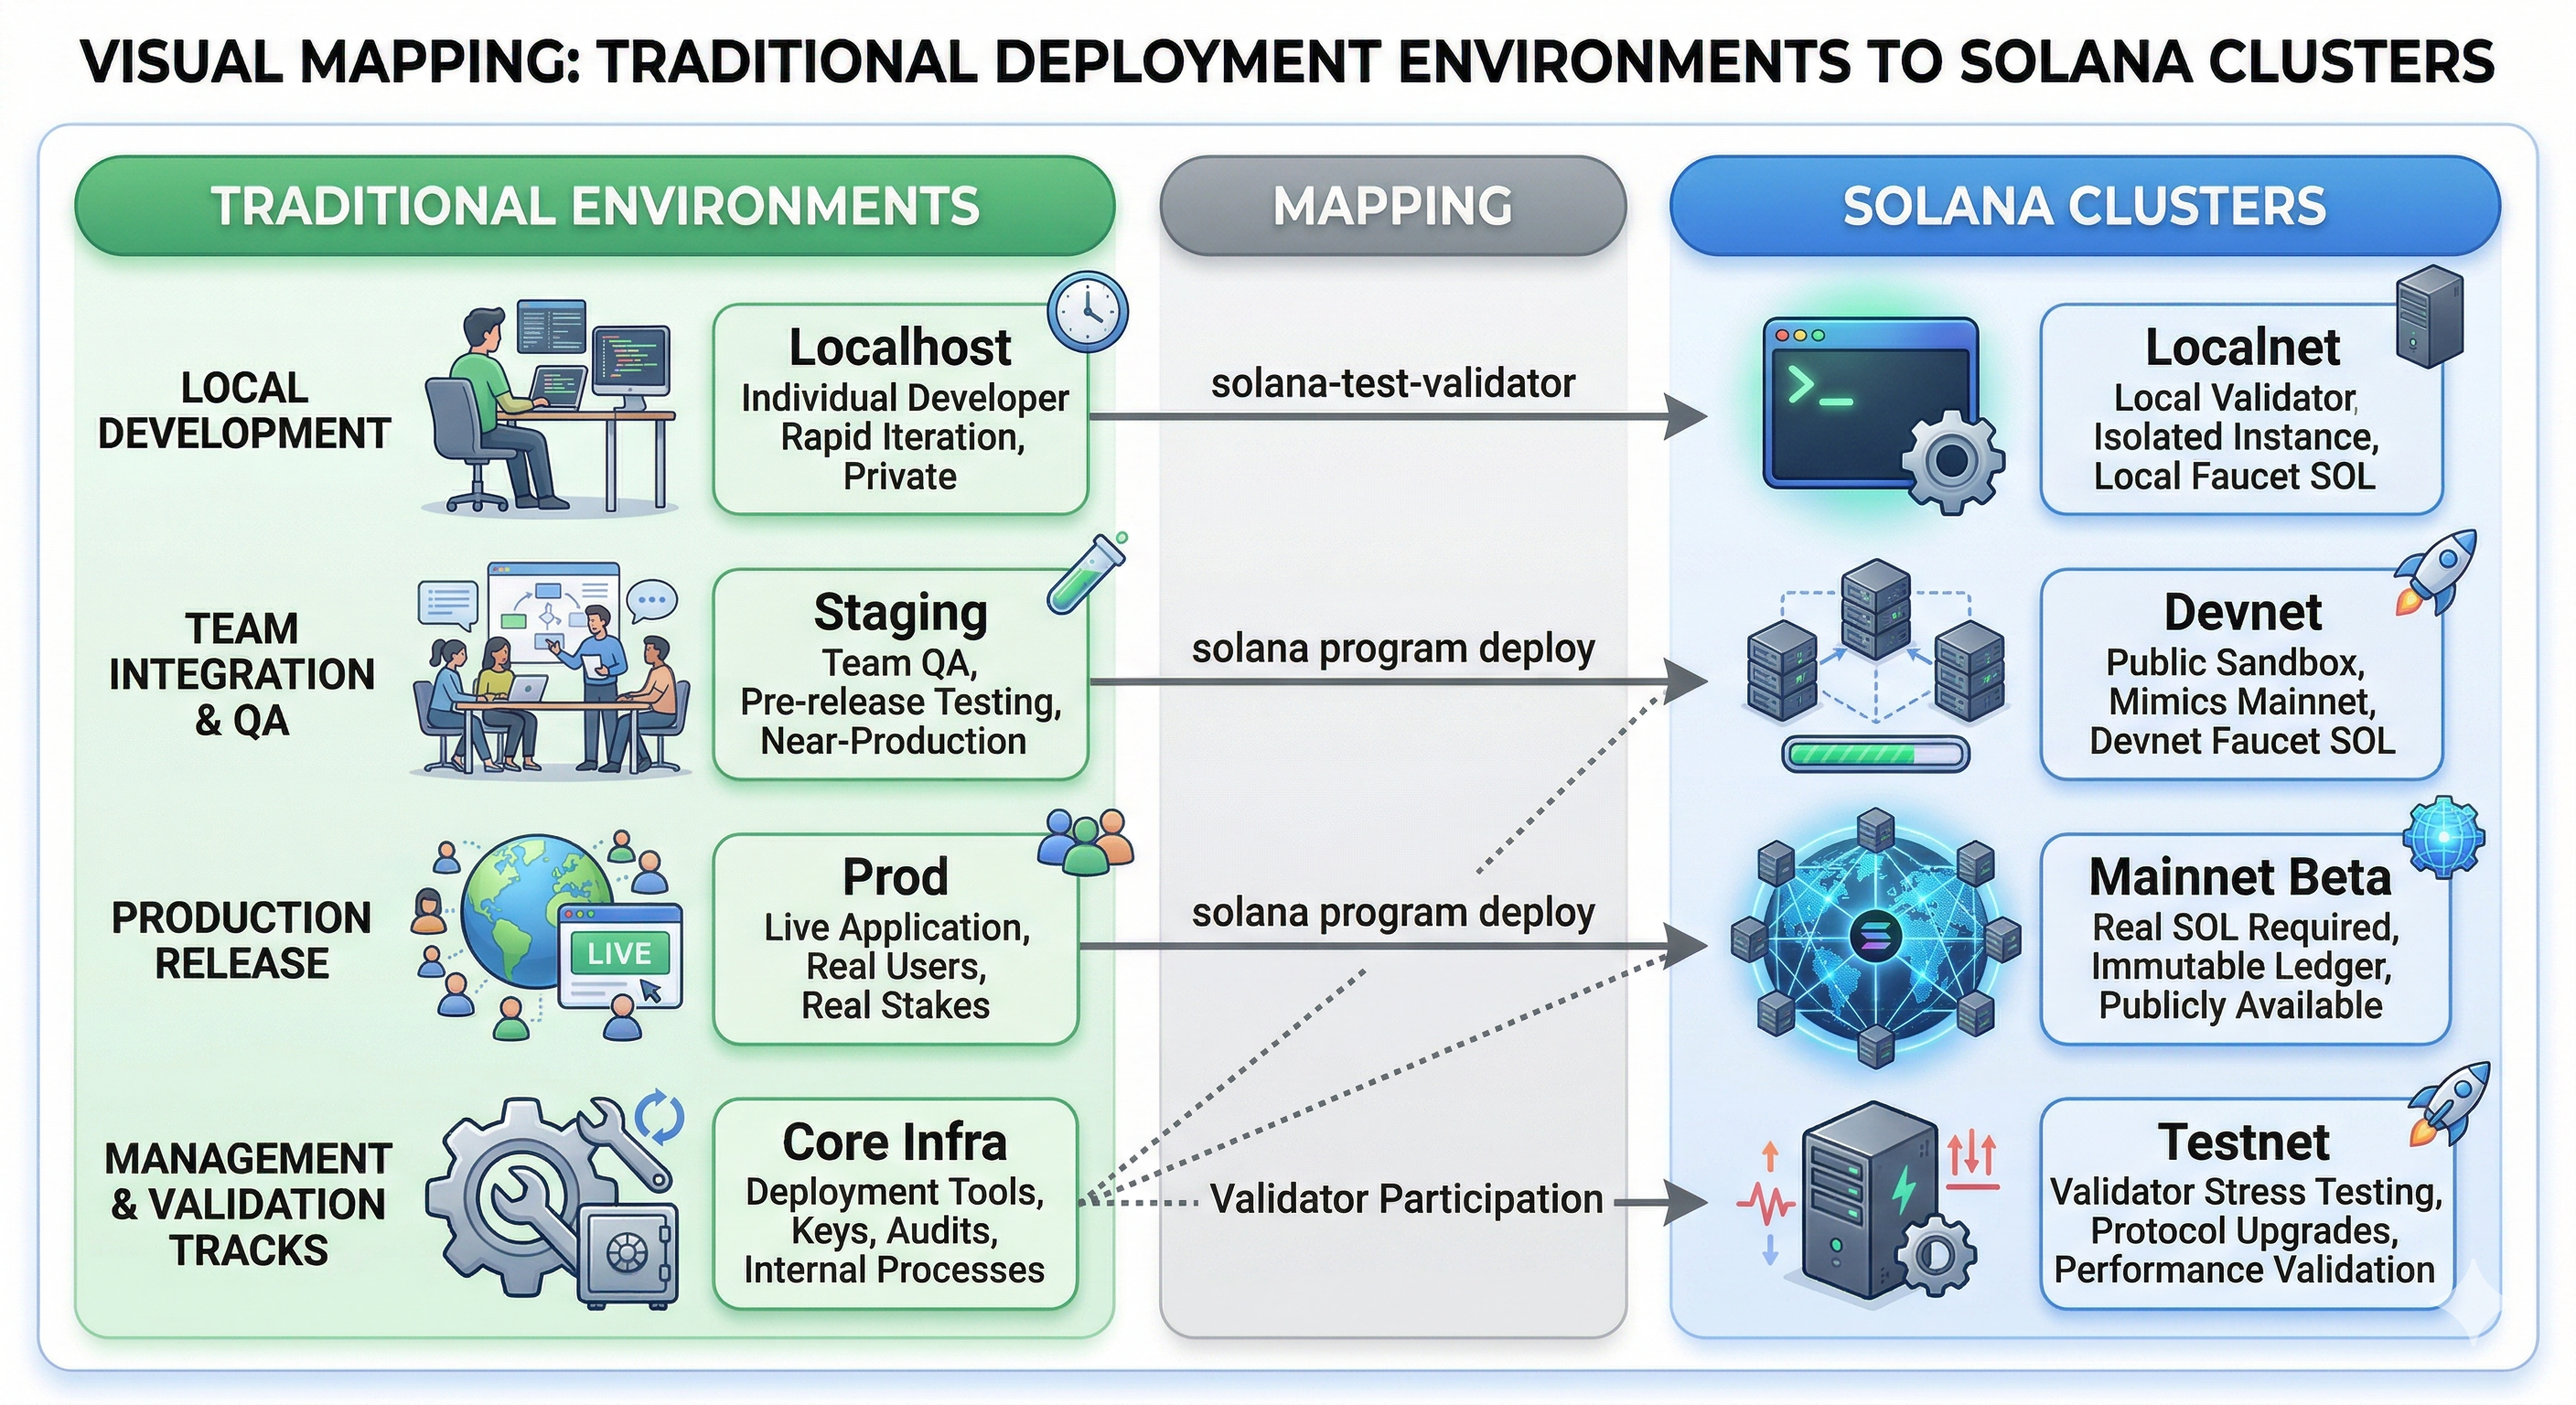
When we deploy applications to cloud providers, we strictly separate our environments into Production, Staging, and Local Development. Blockchain architecture is no different.
Solana has three main public clusters, plus a local option. However, the naming conventions here cause massive confusion for new developers. Let's clear it up:
- Mainnet-beta (Production): This is the real deal. Transactions here cost real money (SOL).
- Devnet (Staging/UAT): This is the developer playground. It operates exactly like Mainnet, but uses dummy SOL. If you are building an app or a token, you deploy it here for your users to test.
- Testnet (Stress Testing): Here is the source of confusion. Despite the name, "Testnet" is not where you test your smart contracts. Testnet is exclusively used by the core Solana labs contributors and validator node operators to stress-test actual blockchain software updates before pushing them to Mainnet. As an app developer, you should practically never use Testnet.
- Localnet (Localhost): Your own personal instance of the blockchain running entirely on your machine, similar to spinning up a local Docker container for your database.
How to toggle between networks in your CLI:
You can point your CLI to any of these networks at any time:
# Switch to Production (Real SOL)
solana config set --url mainnet-beta

# Switch to Staging (Dummy SOL)
solana config set --url devnet

# Switch to Core Infra Testing (Dummy SOL)
solana config set --url testnet

# Switch to Local Environment
solana config set --url localhost
The Devnet Faucet Problem & The Local Validator Solution:
Normally, developers build on Devnet. However, Devnet relies on public "faucets" to dispense free test SOL. Lately, these public faucets are frequently drained by bots, leaving developers stuck with a "dry faucet" and unable to test their code.
Instead of relying on a shared public testnet, we are going to spin up our own Localnet. Open a new terminal window and run:
solana-test-validator
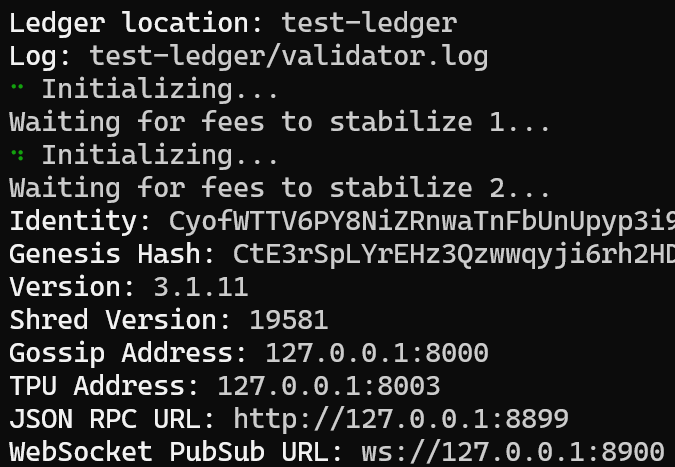
Your local machine is now running a full Solana node. Leave this terminal window running in the background, and in your primary terminal, ensure you are pointed to your new local network:
solana config set --url localhost

💡 PRO-TIP: Cloning Devnet State
If you ever need to interact with a specific smart contract (like a decentralized exchange) that already exists on Devnet, but you want to use the unlimited free SOL of your local machine, you can fork the state of Devnet right into your local validator using the --clone flag. Instead of the standard startup command, you would run:
solana-test-validator --url devnet --clone <PROGRAM_ADDRESS>
3. Generating a Wallet (Strictly Offline)
The blockchain doesn't issue you an account. You generate a cryptographic lock and key locally on your machine.
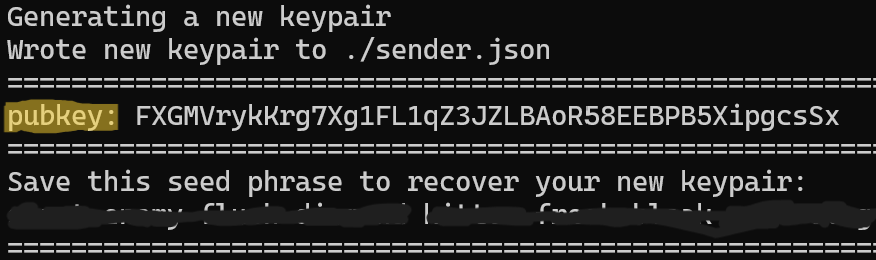
Let's generate a new Solana keypair in our current working directory and name it sender.json. This file will act as our primary wallet—it will hold our funds, and we will use its private key to cryptographically "sign" (authorize) our upcoming transaction.
solana-keygen new --no-bip39-passphrase --outfile ./sender.json
When you run this, two things happen:
- It creates the
sender.jsonfile on your machine (containing your private key). - It prints your Public Key (your address) and a Seed Phrase directly to the terminal.
The Magic of the Seed Phrase
The terminal will display 12 random words (e.g., apple brave crunch...). Many people mistakenly think this is like a "forgot password" recovery email. It isn't. The seed phrase is the literal mathematical DNA of your wallet.
Those 12 words map directly to a massive, randomly generated number. Through standard open-source cryptographic algorithms, that massive number is run through a mathematical formula to derive your exact Private Key, which then derives your Public Key.
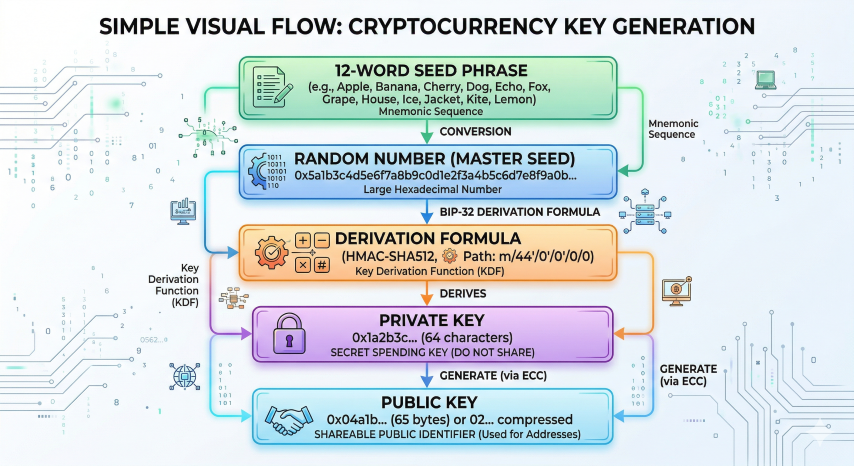
Why is this so powerful? Because it relies on universal math, you don't actually need the sender.json file to keep your funds. If your laptop falls into the ocean, your wallet isn't gone. You can buy a brand new computer, type those same 12 words into the CLI (or a UI wallet like Phantom), and the software will run the exact same formula, perfectly regenerating your specific private key.
⚠️ CRITICAL SECURITY WARNING: DEFAULTS & PASSPHRASES
- The
--no-bip39-passphraseflag: By using this flag, you are storing your private key completely unencrypted in plain text on your hard drive. This is perfect for automated testing scripts or backend bots, but never use this flag for a Mainnet wallet holding real funds.- The Default Directory: If you run
solana-keygen newwithout providing an--outfilepath, the CLI will default to saving your key in a hidden folder at~/.config/solana/id.json. Never use this default file for a real wallet. It is the very first place rogue npm packages or malicious scripts look when trying to scrape hard drives and steal keys.
💡 PRO-TIP: Securing High-Value Wallets
If you ever deploy a token or hold significant real-world value (like treasury funds or large liquidity pools), never store those private keys on an internet-connected computer (a "hot wallet"). Instead, use Cold Storage (a hardware wallet like a Ledger that keeps the seed phrase physically offline) or implement a Multisig (Multi-Signature) smart contract, which requires multiple developers to digitally approve a transaction before funds can move.
To view the Public Address of your new sender wallet anytime, run:
solana address -k ./sender.json
4. Funding the Wallet (The Unlimited Airdrop)
To interact with the database, we have to pay a tiny fee to the nodes processing our request. Because we are running our own local network, we are the central bank. We can mint as much test SOL as we want, and the faucet will never run dry.
Let's explicitly tell the network to send 100 SOL to our sender wallet:
solana airdrop 100 ./sender.json
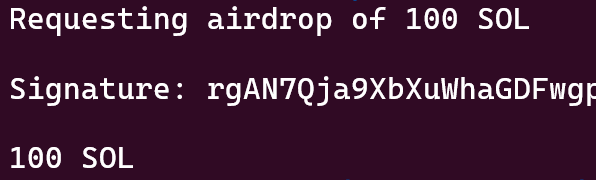
Wait a few seconds for your local node to process it, then check your balance:
solana balance ./sender.json
You should now see 100 SOL. Your offline mathematical lock is officially registered on your local ledger with a massive balance.
5. Broadcasting and Verifying a Transaction
Let's actually move some data. We need someone to send funds to, so let's quickly generate a second, dummy receiver wallet in our directory:
solana-keygen new --no-bip39-passphrase --outfile ./receiver.json
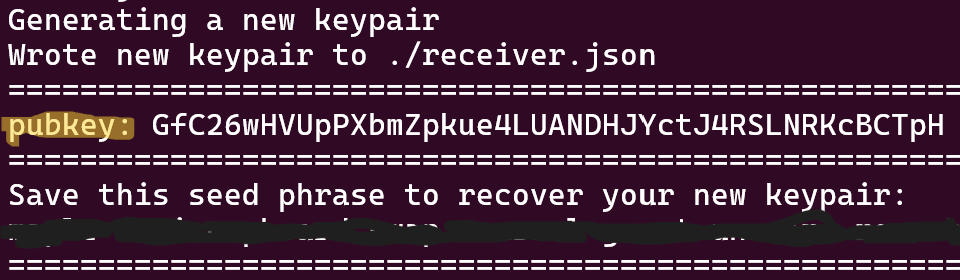
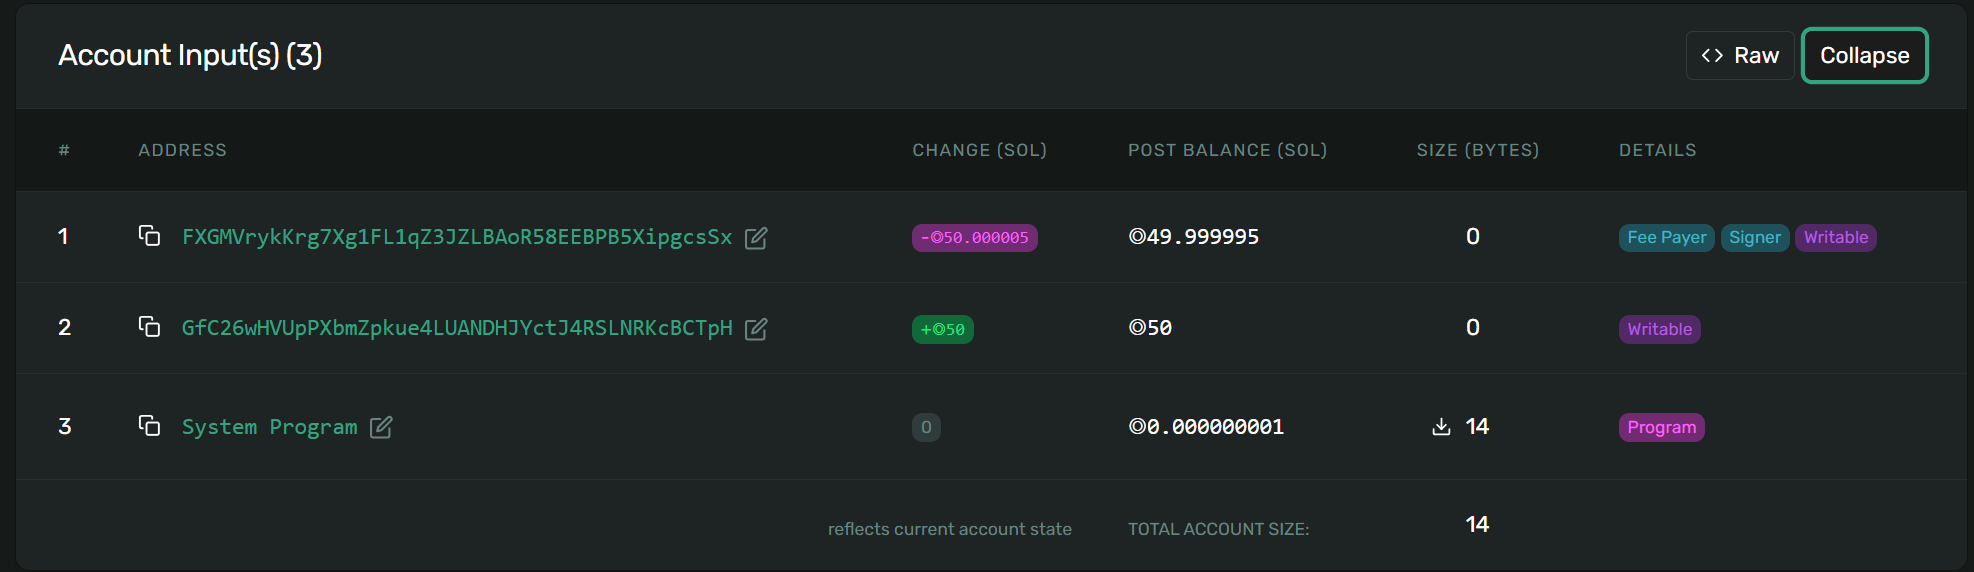
Now, we construct a transaction. We will tell our local Solana network: "Take 50 SOL from my sender wallet, and assign it to the receiver wallet." Notice in the command below, we use the --keypair flag to pass our sender.json file. This tells the CLI to use that specific private key to sign the transaction.
# Get the public address of our receiver
RECEIVER_ADDRESS=$(solana address -k ./receiver.json)

# Send 50 SOL from the sender to the receiver
solana transfer $RECEIVER_ADDRESS 50 --allow-unfunded-recipient --keypair ./sender.json

The terminal will output a Transaction Signature. This is your receipt.
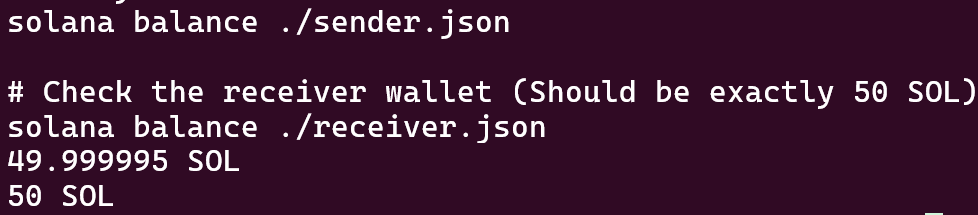
Let's verify the ledger actually updated by checking the balances of both local files:
# Check our sender wallet (Should be down 50 SOL, minus a tiny fraction of a cent for the network fee)
solana balance ./sender.json

# Check the receiver wallet (Should be exactly 50 SOL)
solana balance ./receiver.json
Viewing it in the Explorer:
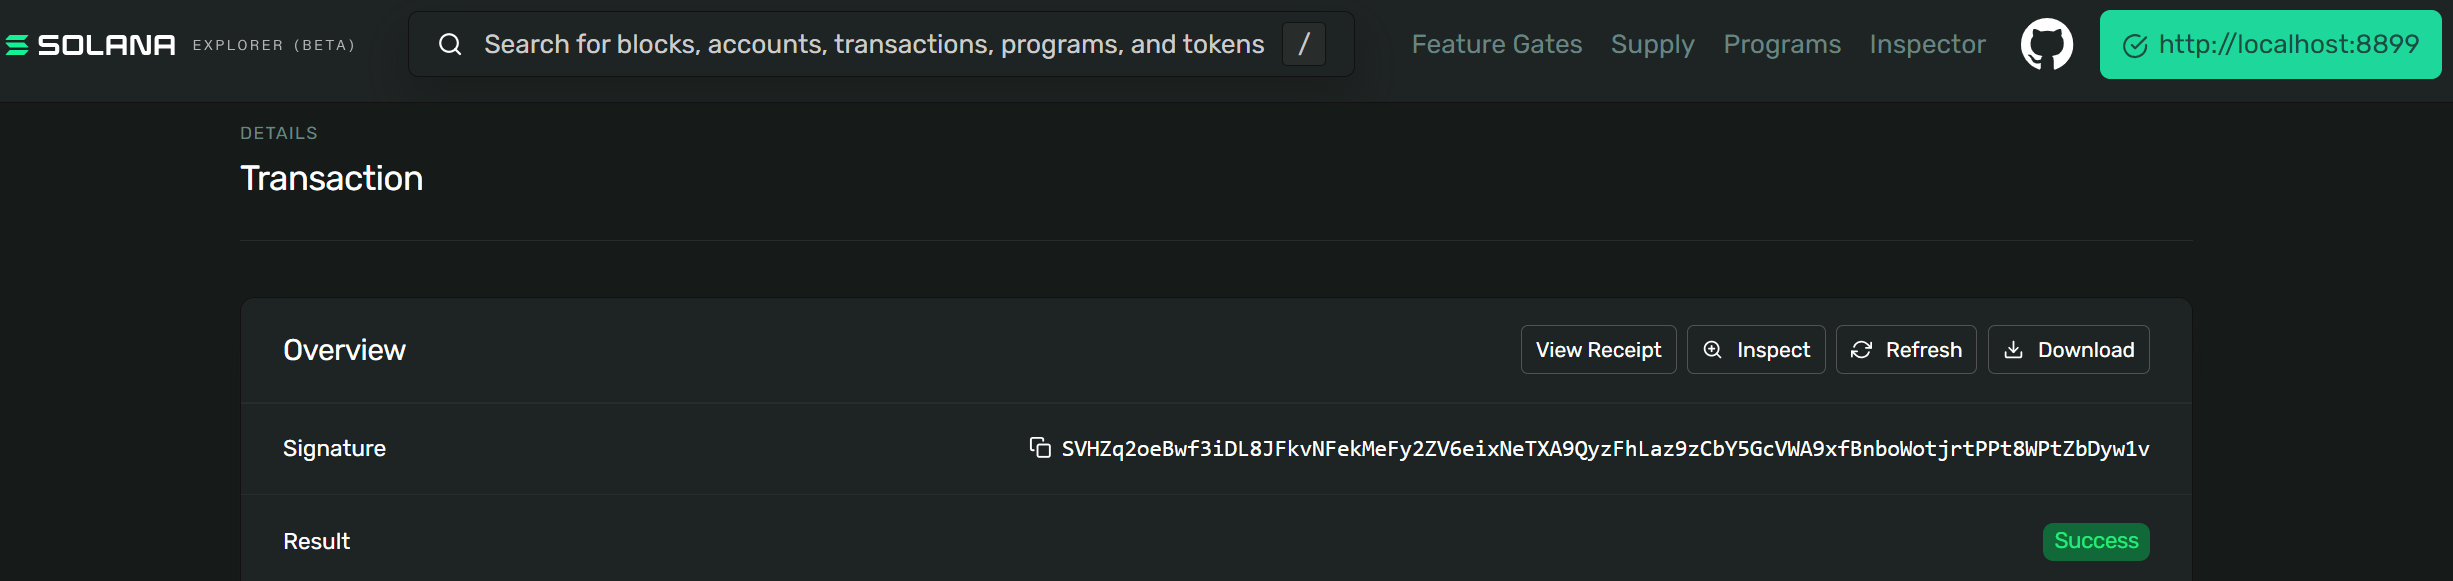
You can also view this transaction visually on the web. Go to the Solana Explorer.
Important: By default, the Explorer searches the production Mainnet. If you search your signature now, it will say "Not Found." To fix this, click the green network button in the top right corner of the website, scroll down, and select Custom RPC URL (which points to your local http://localhost:8899). Now, paste in your signature, and you will see the exact database entry you just created.
What’s Next?
Look at what we just accomplished. We didn't sign up for an exchange or hand over an email address. We used open-source tools to spin up an entire local blockchain, clarified the network architecture, bypassed public rate limits, generated specific sender and receiver keys, altered the database state programmatically, and verified the balances.
This is the actual power of Web3. If we find ourselves running these commands repeatedly for new projects, it's incredibly easy to wrap this boilerplate into an automated bash script to keep our workflow DRY.
In our next post, we are going to use this exact same local environment to step into the role of a smart contract developer. We will mint our very own SPL token, and more importantly, we will apply the strict security by design principles we discussed in Part 2 to ensure it is mathematically impossible to rug pull.
Stay tuned.
Community Discussion
0 Comments
Found this helpful?
If you enjoyed this technical tale, consider supporting my work.